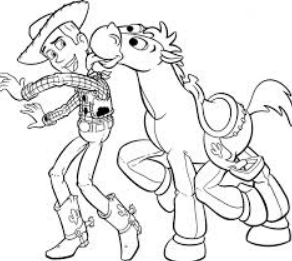
How to Draw Woody
The Toy Story movie sequence is one of the multiple precious franchises ever completed. Four movies are in the primary sequence, and numerous TV shows, video games, books, and other merchandise are centered on these surfaces. One of the central characters is the cowboy toy, Woody. Fans love this character because of his sarcastic yet honorable nature, and his journey to understanding to be slightly jealous and count on his friends has delighted audiences. Learning to draw Woody is a great way to honor this classic character! If you like this character, there will be a lot to like in this tutorial. Our step-by-step guide on drawing Woody in just six steps will quickly show you how to recreate this famous cowboy toy. drawing a girl’s face
How to Draw Woody
Step 1
In this initial phase of our focus on drawing, Woody will see you begin drawing his head. Woody’s head is relatively narrow and elongated, so you can begin by removing a spherical line to complete this form as it emerges in the connection picture. Next, draw a smaller curved line for the base of her neck underneath. Next, draw her ears to the side with a few curved lines for her hair on the flanks. Woody is nearly forever seen with his favorite cowpoke headdress, so we’ll start drawing it. Mark a spherical line on the lid of his head, then dial in another for the top of the hat. Once you’ve drawn all of these aspects, you’ll be ready for step 2.
2: Step Draw his facial features and chest.
To continue your drawing of Woody, we will then draw his features and chest. For the facial features, we’ll start with his eyes. Its eyes are round in shape with large circular pupils inside. His eyelids will also be lowered slightly for his facial expression. Then you can draw her eyebrows using simple shapes and then draw her nose and smiley mouth underneath. Next, we draw his chest. Woody wears a vest with cowhide patterns on it, and this has his star-shaped sheriff badge on it. Then, pull the buttons of his shirt between the vests, compose his scarf and then pull his belt. Finish by drawing the gun holster on the left side of his waist, and then it’s time to move on to step 3.
Step 3: Now, draw his arms.
In this guide on drawing Woody, we will portray him in a dynamic running pose. To begin, we will start by drawing his arms. His bras are made of padded fabric, so they’ll swing wildly as he runs. Use curved lines to represent her arms, with left-slanting downward. The one on the request will be spread a spell, and we’ll bring a more admissible look at the hand on that arm. Also, be sure to draw the rounded rectangular sections of her sleeves onto her wrist! That’s all there is to do, for now, so you can move on.
Step 4
Like her bras, Woody’s legs are made of soft padded fabric. As we draw them, they will have the same way as the arms. The portion on the left flank will be more refined and developed further along than the additional. This other leg will be a little more bent, which will help show that he is halfway. You can also start drawing the upper rims and the first sections of his boots under his legs. We’ll leave the bottom of the boots undrawn for now, but you’ll finish them with the final details in the next step.
Step 5 – Add Final Details to Your Woody Drawing
In this step in our guide on drawing, Woody will finish up the last details and points. To form, we will remove the base of his boots. For the left boot, we will see the shoe’s base, while for the other; we will only see the top. You can finish the boots by drawing the stirrups attached to the back of them. Then you can finish the design by adding the plaid pattern to his shirt. Once this is drawn, you can also add your ideas! Possibly you could pull a scene to exhibit your favorite scene from the movie or maybe even add other characters from the movies.
Step 6: Finish your Woody drawing with color.
You are ready to finish this drawing of Woody with some colors! We’ve gone with the typical colors he’s seen throughout the movies in our reference image, so you can copy our example to keep it accurate. Some colors include brown for his hat and boots, yellow for his shirt, and blue for his pants. Do you represent his typical color palette or perhaps create your Woody variation by changing the colors? Even if you stick to her usual colors, you can still have some color variation by experimenting with the artistic tools and mediums you choose.
You can now complete it by adding your ideas, elements, and details! What will you do to finish your drawing? Our website is full of many fantastic drawing guides to enjoying. These have provided a wide range of topics, so head over and check out our ever-growing selection! You’ll enjoy matching in often to provide you don’t miss a thing. You can also show how your Woody sketch came out by transferring it on our Facebook and Interest carriers. We can’t stay to see how large your amazing photo is!