
If you know anything about Microsoft’s Office 365 you know that it can be a tedious task to move Office 365 mailbox to another user. It is an absolute nightmare for IT support and maintenance people when companies go through mergers or rebranding and they have to transfer the data between them. Now let us look at some of the pre-migration measures that you have to follow before you choose and start any of the methods given below.
Some of The Preparations To Do Before Moving Office 365 To Another User
Regardless of the method, you choose to transfer Office 365 mailbox to another account. There are a few things that you must do to make sure that the data transfer happens in the smoothest way possible between the users.
- The primary email domain should be removed from all the objects in the source tenant.
- Reset all the URLs to their initial state, that is reset any preferences that you have changed should be changed back to default.
- Remove Microsoft Lync license using Lync admin interface.
- Reset all the email addresses on rooms, distribution lists, and resources. And make a configuration that specifies the targeted account’s mailboxes.
What Are Some Methods To Move Office 365 Mailbox To Another User?
A wide variety of methods are present which can be used in this situation to transfer the data to another account.
Some of them are manual methods that we can use like using Powershell or EAC.
There are also easier methods that we could use which are much smoother to transfer data. Like using a professional tool to transfer Office 365 mailbox to another account. Let us go through each of the methods one by one and see the steps that are required to perform the above mentioned problem.
How To Move Office 365 Mailbox To Different Account Using Powershell?
This is one of the most difficult to execute methods that we are going to discuss here today. Since using this method includes the PowerShell command line to run a batch of commands on the Powershell terminal. If you are not that familiar with terminals and command lines then we really do not recommend using this method unless and until you know what you are doing. This is due to the reason that, if the steps are not executed in the process in the right way then there lies a huge potential risk of losing the data. This can be very difficult since it will be very hard to recover afterwards once its escort antalya lost.
Now let us go through the different commands that we have to use to move Office 365 Mailbox to different accounts using Microsoft’s PowerShell.
-
- Create a CSV file called password.csv and create two columns called “upn” and “password” in it.
- Fill the rest of the document with all the account information available from the source tenant .
- Launch Microsoft Exchange PowerShell and enter the following commands in the exact order as given below.
-
# Script: showproxies.ps1
- # proxyaddress to a .CSV file (addresses.csv)
- # $proxyaddr = “onmicrosoft.com”
- $proxyaddr = “onmicrosoft.com”
- # Create an object to hold the addresses
- $addresses = @()
- # Obtain entire mailbox in the Exchange server
- $Mailboxes = Get-Mailbox -ResultSize Unlimited
- # Loop through the mailboxes
- ForEach ($mbx in $Mailboxes) {
- # Loop through every address present in the mailbox
- Foreach ($address in $mbx.EmailAddresses) {
- # If it contains XXX, Record it
- if ($address.ToString().ToLower().contains(“onmicrosoft.com”)) {
- # This is an email address. Add it to the list
- $obj = “” | Select-Object Alias,EmailAddress
- $obj.Alias = $mbx.Alias
- $obj.EmailAddress = $address.ToString() #.SubString(10)
- $addresses += $obj
- }
- }
- }
- # Exporting the final result to a csv file
- $addresses | Export-Csv addresses.csv -NoTypeInformation
- # Open the csv file
- Invoke-Item addresses.csv
- ##### END OF SHOWPROXIES.PS1
- After running these commands a copy of the messages will move to Office 365 Mailbox to another user account. Hence Now we have to create a room to store these mailboxes
- To create a room for your Mailbox do follow the exact commands below
Script: create-rooms.ps1
- #This script creates Room mailboxes in Office 365.
- # Syntax:Create-Rooms.ps1 -inputfile “file name.csv”
- # Dependencies: Input file should have three columns: RoomName, RoomSMTPAddress, RoomCapacity
- param( $inputFile )
- Function Usage
- {
- $strScriptFileName = ($MyInvocation.ScriptName).substring(($MyInvocation.ScriptName).lastindexofany(“\”) + 1).ToString()
- @”
- NAME:
- $strScriptFileName
- EXAMPLE:
- C:\PS> .\$strScriptFileName -inputfile `”file name.csv`”
- }
- If (-not $inputFile) {Usage;Exit}
- #Get MSO creds and initialize session
- If ($cred -eq $NULL) {$Global:cred = Get-Credential}
- If ($ExchRemoteCmdlets.AccessMode -ne “ReadWrite”)
- {
- Write-Host
- Write-Host Connecting to Office 365…
- Write-Host
- $NewSession = New-PSSession -ConfigurationName Microsoft.Exchange -ConnectionUri https://ps.outlook.com/powershell -Credential $cred -Authentication Basic -AllowRedirection
- $Global:ExchRemoteCmdlets = Import-PSSession $NewSession
- }
- #Import the CSV file
- $csv = Import-CSV $inputfile
- #Create Rooms contained in the CSV file
- $csv | foreach-object{
- New-mailbox -Name $_.RoomName -room -primarysmtpaddress $_.RoomSMTPAddress -resourcecapacity $_.RoomCapacity
- }
##### END OF CREATE-ROOMS.PS1
Run the following commands to delete the secondary address from Office 365 Mailbox.
-
#Script: remove-proxy.ps1
- #This script will remove the secondary email address from users
- # Syntax:remove-proxy.ps1 -inputfile “filename.csv”
- # Dependencies:Input file should have two columns: Username and Emailsuffix
- # Example: Username=tim, Emailsuffix=fabrikam.com
- param( $inputFile )
- Function Usage
- {
- $strScriptFileName = ($MyInvocation.ScriptName).substring(($MyInvocation.ScriptName).lastindexofany
- (“\”) + 1).ToString()
- @”
- NAME:
- $strScriptFileName
- EXAMPLE:
- C:\PS> .\$strScriptFileName -inputfile `”file name.csv`”
- “@
- }
- If (-not $inputFile) {Usage;Exit}
- #Get MSO creds and initialize session
- If ($cred -eq $NULL) {$Global:cred = Get-Credential}
- #
- If ($ExchRemoteCmdlets.AccessMode -ne “ReadWrite”)
{
- Write-Host
- Write-Host Connecting to Office 365…
- Write-Host
- $NewSession = New-PSSession -ConfigurationName Microsoft.Exchange -ConnectionUri
- https://ps.outlook.com/powershell -Credential $cred -Authentication Basic -AllowRedirection
- $Global:ExchRemoteCmdlets = Import-PSSession $NewSession
- }
- $csv = Import-CSV $inputfile
- $csv | foreach-object{
- # Allocate variable for email address to purge
- $removeaddr = $_.username + “@” + $_.emailsuffix
- Write-Host (“Processing User: ” + $_.UserName +” – Removing ” + $removeaddr)
- Set-Mailbox $_.Username -EmailAddresses @{Remove=$removeaddr}
- }
##### END OF REMOVE-PROXY.PS1
After performing these commands you will have moved the data to the new mailbox.
Also read : How to Recover Photos from Formatted Laptop?
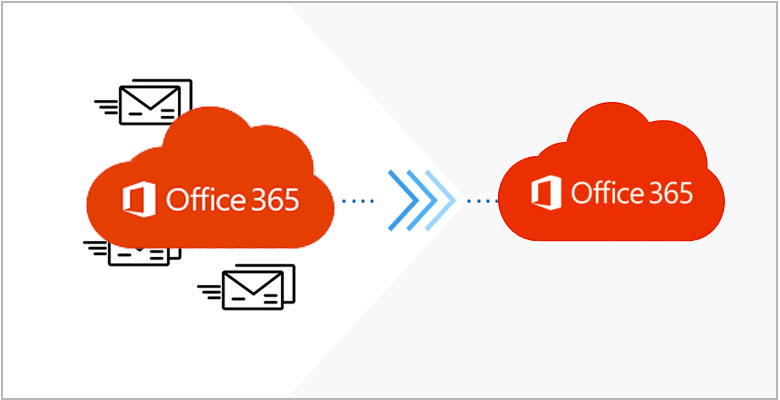
How To Move Office 365 Mailbox To Another User Using Professional Tool?
As we have seen using the manual method is much more difficult. It also has the potential of losing data if not executed properly. In this method, we use a secure Office 365 to Office 365 migration tool to transfer Office 365 mailbox to another user. This is one of the most secure Office 365 Migration Tool which makes the whole process much easier and more seamless for the user.
Simple Steps To Migrate Office 365 Mailbox To Another User
- Download install and open the tool on your system
- Select both the source and destination as Office 365 and click on next.
- Choose the category that you want to transfer like email, contacts, etc, and click on the next button.
- On the next screen enter the source Office 365 credentials and also validate the required permissions and press the next option.
- After that validate the permission of the destination Office 365 account by using its credentials and click on the next button.
- The tool also provides 3 options for mapping the users between source and destination. Choose the one that you require.
- Once the mapping is done validate authorization by clicking on the validate option.
- Once the permissions are validated click on the start migration button.
Once the process has completed successfully you will be able to move Office 365 Mailbox to another user.
Also read: How to Import PST to Office 365 webmail?
Conclusion
In this article, we have taken a look at two ways that we can use to migrate Office 365 to another user. We have also taken a look at the manual methods. These methods are complicated and pose the risk of data loss if they are not executed properly. Hence we recommend using the professional tool since it provides the easiest and safest way to move Office 365 Mailbox data to another user. Using the tool also removes any risk of data loss while the migration process is happening.